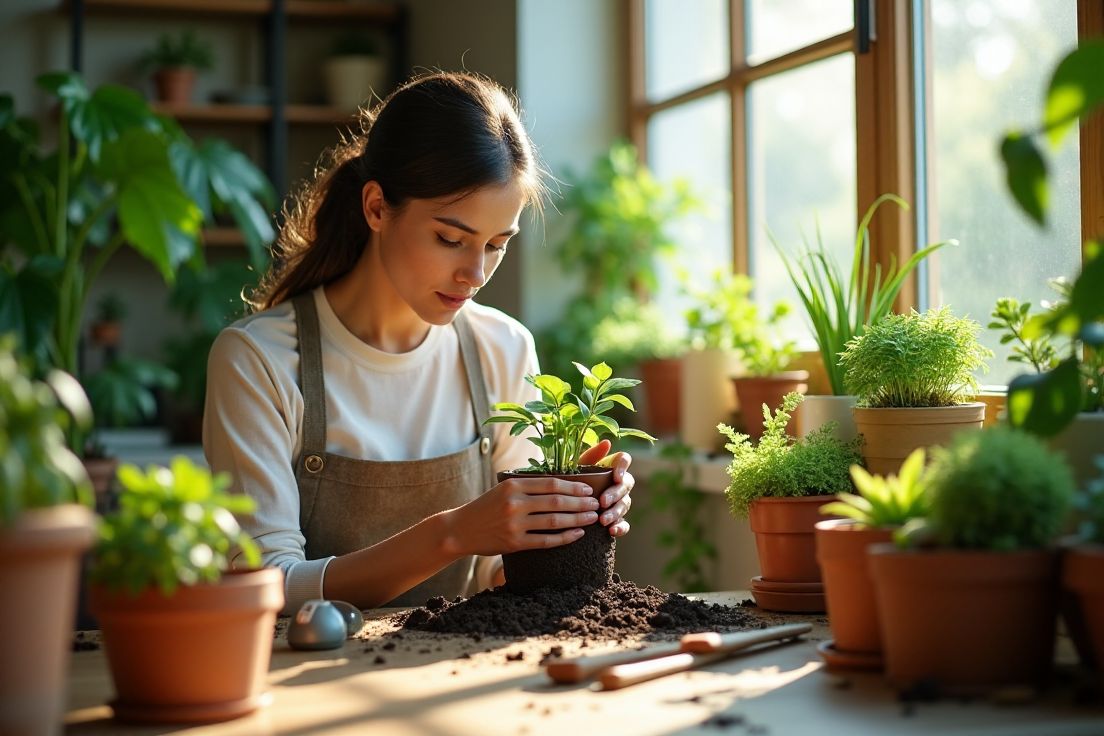
Repotting your plants is an important process that can help them grow better and stay healthy. When plants outgrow their current pot, they might show signs like roots growing out of the bottom or leaves turning yellow. This is your cue that it’s time for a change!
In this guide, we’ll explore the essential steps to successfully repot your plants. From checking root health to selecting the right potting soil, these tips will ensure your plants have a smooth transition to their new home. Let’s get started on making your plants thrive!
Essential Steps for Successfully Repotting Your Plants
To prepare your plants for repotting, start by assessing their current condition. Check for signs that they need a new home, such as roots emerging from the drainage holes or stunted growth despite proper care. Once you confirm it’s time to repot, give the plant a good drink a day before the process. This ensures that the soil is easier to work with and reduces stress for the plant.
Gather your supplies: a new pot one size larger, fresh potting mix, and tools like scissors or a trowel. If you plan to prune the roots, have clean scissors ready. It can help to gently loosen the soil around the edges of the pot before you try to remove the plant. This can make the transition smoother, reducing the risk of breaking roots.
Before taking the plant out of its old pot, make sure your new pot has proper drainage holes. This prevents water from pooling at the bottom, which can lead to root rot. When you finally remove the plant, inspect the roots. Trim any that look brown or mushy to encourage healthy growth.
Choosing the Right Time for Repotting
When it comes to repotting, timing can significantly impact your plant’s health and recovery. The best time to make this change is during the spring or early summer when many plants are actively growing. This period allows them to take advantage of the increased light and warmth to establish roots in their new pot.
Another key factor is the plant’s growth cycle.
Look for signs that indicate the ideal time. If a plant is root-bound, with roots circling tightly at the bottom or even peeking out of the drainage holes, its time for a larger pot. Additionally, if you notice slow growth or leaf drop, it could indicate that the plant is outgrowing its current home, signaling that repotting is needed.
Seasonal changes also play a role.
Assessing Your Plant’s Root Health
To check your plants root health, start by gently removing the plant from its pot. Be mindful as you do this to minimize stress on the plant. Once out, take a close look at the roots. Healthy roots should be firm and white or light tan in color.
If you notice any brown, black, or mushy roots, this can indicate a problem, such as root rot. These unhealthy roots need to be trimmed away for the plant to thrive.
While examining, also look at the overall root structure. Roots that are tightly wound or circling around the pot suggest that the plant may be root-bound.
This table outlines different indicators of root health in plants and the appropriate actions to take for each condition.
| Root Condition | Indicators | Recommended Action |
|---|---|---|
| Root Rot | Brown, black, or mushy roots | Trim away unhealthy roots and adjust watering practices |
| Healthy Roots | Firm, white or light tan roots | No action needed; ensure proper care |
| Root-Bound | Roots tightly wound or circling around the pot | Repot the plant into a larger container |
| Underdeveloped Roots | Short, thin roots | Ensure adequate nutrients and proper watering |
| Diseased Roots | Blackened roots with a foul smell | Remove and dispose of infected roots |
| Dry Roots | Dry, brittle roots | Increase watering and humidity |
In this case, its crucial to loosen the roots slightly to encourage them to spread out in their new container. You can do this by gently pulling them apart or making a few cuts into the root ball.
Additionally, check for signs of pest infestations. Roots can be susceptible to pests like root aphids that damage them and hinder growth.
If you spot any pests, take quick action to remove them using appropriate methods.
Dont forget the soil. Soil that looks dry or has a bad odor can lead to unhealthy roots. Fresh, appropriate potting mix supports root health by providing the right nutrients and drainage.
Ensuring the roots have a healthy environment in the new pot is essential for your plants recovery and growth.
Healthy roots are the foundation of flourishing plants. Ensuring that the roots have a suitable environment in their new pot can make a significant difference in their recovery and overall growth.
- Choose a pot with adequate drainage to prevent waterlogging.
- Use high-quality, well-draining potting soil to promote root health.
- Keep the pot in a location with appropriate light conditions for the specific plant type.
- Water the plant adequately, avoiding both dryness and overwatering.
- Monitor for pests and diseases to protect the roots from potential harm.
Selecting the Appropriate Potting Soil
Selecting the right potting soil is crucial for the health of your plants. Different plants have different needs, so understanding those needs will help you choose the best mix. For example, succulents and cacti thrive in a gritty, well-draining soil because they are accustomed to dry conditions. On the other hand, tropical plants often prefer a richer, moisture-retaining mix to mimic their native habitats.
Selecting the right potting soil is essential for nurturing healthy plants. Here are some important considerations to keep in mind when choosing the best mix for your plants:
- Understand the specific needs of your plants: Research the requirements for drainage, moisture retention, and nutrient content.
- Opt for well-draining soil for succulents and cacti: Look for a mix that includes sand or perlite to promote airflow and moisture control.
- Choose a nutrient-rich mix for tropical plants: Look for soil that retains moisture yet allows excess water to escape, ensuring roots remain hydrated without becoming soggy.
- Consider pre-mixed potting soils: Many garden centers offer specialty blends tailored to specific plant types, saving you the effort of mixing your own ingredients.
- Monitor plant growth and health: Adjust your soil choice based on how well your plants are thriving to ensure they receive the best environment possible.
When shopping for potting soil, look for quality products that are labeled for specific plant types, such as orchids, African violets, or general houseplants. These mixes are specially formulated to provide the right texture and nutrient balance. If you can’t find a pre-made mix suitable for your plant, you can create your own by combining potting soil with ingredients like perlite for aeration and coconut coir to retain moisture.
Always avoid using garden soil for indoor plants, as it can be too dense and may introduce pests or diseases.
High-quality potting mixes are lightweight and provide the necessary nutrients while ensuring adequate drainage, which is essential for root health. Remember to check the ingredients to avoid any soil that contains chemical fertilizers, which can harm sensitive roots.
Finally, consider the size of the pot you are using. A larger pot may require a different mix as the larger volume of soil can retain more moisture.
Transforming Your Indoor Plants for Vibrant Life
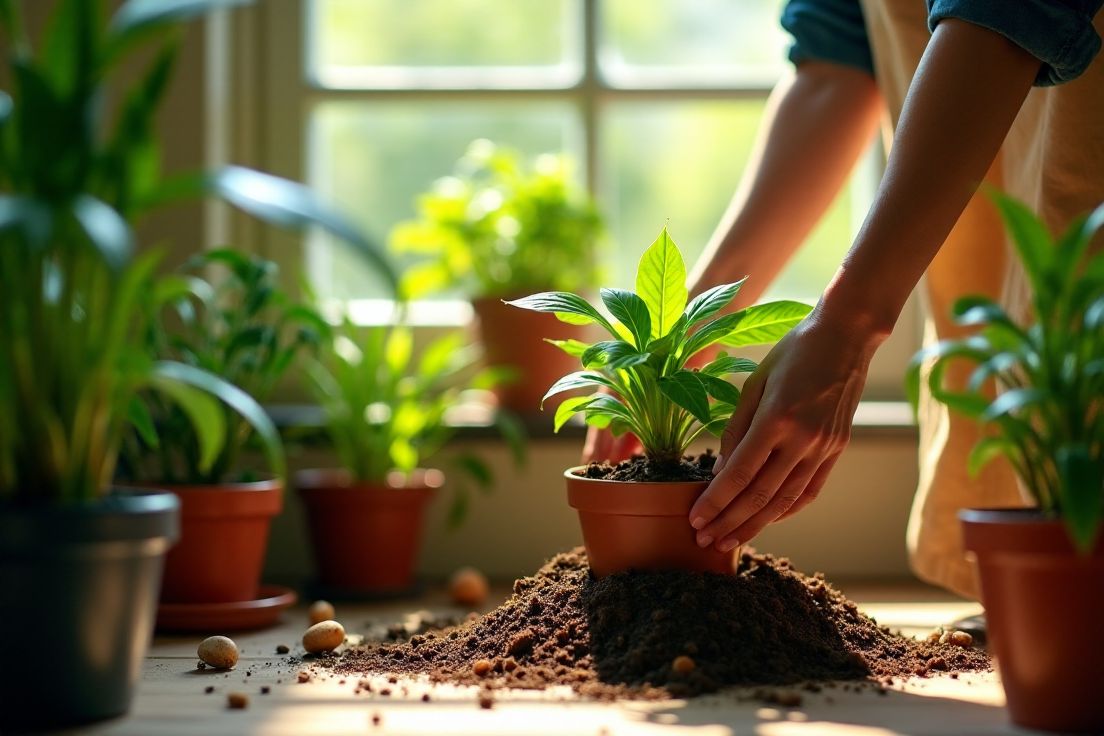
To get your plants ready for repotting, start by carefully examining them. This helps in identifying any issues that may need attention. Remove the plant from its pot with caution to avoid damaging the roots. Its best to do this when the soil is moist, as it makes it easier to loosen the plant from its old container.
Once the plant is out, take a good look at the root system. If you notice any roots that are dark or soft, these should be cut away to promote healthier growth in the future. Healthy roots are usually a light color and feel firm to the touch. If the roots are wound tightly, gently separate them by pulling them apart or making a few cuts to free them.
Next, ensure that your new pot is clean and has adequate drainage holes at the bottom. This is essential to prevent water from accumulating, which can lead to root problems. When filling the new pot with soil, it’s a good idea to add a layer of fresh potting mix at the bottom. This creates a cushion for the roots and encourages better growth.
After placing the plant in the new pot, fill in around the sides with fresh potting mix. Press the soil down gently to eliminate air pockets, providing good support for the roots. Be sure not to bury the plant too deep; the top of the root ball should sit just below the rim of the pot. Water the plant thoroughly after repotting to help settle the soil.
Preparing your plants for repotting is an essential step in their care. Here are some helpful points to keep in mind:
- Inspect the roots for any signs of rot or damage before repotting.
- Gather all necessary tools, including a new pot, fresh soil, and pruning shears.
- Consider the size of the new pot; it should be slightly larger than the current one.
- If the plant is root-bound, gently tease apart the roots to encourage growth in the new soil.
- Water the plant thoroughly after repotting to help settle the soil around the roots.
Assessing Root Health Before Repotting
Before you start repotting, its important to carefully evaluate the health of the roots. Begin by gently taking the plant out of its pot. This will allow you to closely inspect the roots without causing too much disturbance. Healthy roots should feel firm and be a light color, typically white or light tan.
If you notice darker, soft, or mushy roots, its a sign of root rot, which needs to be addressed. Trim away any unhealthy sections to promote better growth.
Next, observe the overall arrangement of the roots. If they are tightly packed or wrapped around each other, this indicates that the plant may be root-bound.
Loosening the roots slightly by teasing them apart can help encourage new growth in the fresh soil.
Additionally, check for any signs of pests, such as small insects or webbing on the roots. If pests are present, they can hinder the plant’s growth and should be dealt with promptly. Lastly, consider the condition of the soil.
Choosing the Right Potting Mix for Your Plants
When it comes to selecting the ideal potting mix, consider the specific requirements of your plants. Each type has its own preference for moisture, drainage, and nutrients. For instance, succulents thrive in sandy mixes that enhance drainage, while moisture-loving plants, like ferns, benefit from a mix that retains water and nutrients.
Check the ingredients in any potting mix you consider.
A good blend often contains organic matter like peat moss or coconut coir, which helps retain moisture without becoming waterlogged. Additionally, components such as perlite or vermiculite improve aeration and drainage, essential for healthy root systems.
It’s also wise to keep in mind the size of the pot. If you’re using a larger container, a potting mix that balances moisture retention and drainage is crucial since larger amounts of soil hold more water, which can lead to issues for roots.
Another factor is the specific type of plants you are potting. Researching your plant’s needs can guide your choice. Some plants flourish in nutrient-rich soil, whereas others prefer a lean mix that prevents them from becoming over-fertilized.
Lastly, don’t be afraid to experiment.
Timing Your Repotting for Optimal Growth
Choosing the correct time for repotting can significantly enhance your plant’s growth and vitality. Observing your plant’s growth cycle carefully is essential. Performing this task in early spring or early summer coincide with the time when most plants are entering their active growth phase. During these seasons, warmer temperatures and longer days provide optimal conditions for establishing new roots.
Repotting your plants at the right time is crucial for their health and growth. Here are some key points to consider when planning to repot your plants:
- Monitor root growth: Check for roots coming out of the drainage holes as a sign that your plant needs repotting.
- Choose the right pot size: Select a pot that is one size larger than the current pot to ensure enough room for growth.
- Avoid wet soil: Repot when the soil is slightly dry to minimize stress on the plant during the transition.
- Use fresh soil: Incorporate new potting mix to replenish nutrients and support healthy root development.
- Water after repotting: Water your plant thoroughly after repotting to help settle the new soil around the roots.
Pay attention to your plant’s specific conditions. If the roots are sprawling out of the pot or curling in on themselves, that’s a clear sign of needing more space. Watch for growth slowdowns or yellowing leaves as additional signals. These symptoms suggest that your plant might be running out of nutrients or space.
Timing your repotting when you notice these indicators will boost recovery and growth potential.
Also, keep in mind any environmental changes. Gradually increasing humidity and temperature during spring supports faster acclimatization to a new environment after repotting. The shift in seasons can make a difference in how quickly plants adapt to their new homes.
Essential Steps for Repotting Your Plants Successfully
Preparing your plants for repotting is a key step to ensure their health and vitality. Begin by gently inspecting the plant and its root system. Pull the plant from its pot carefully to minimize trauma to the roots. When the soil is moist, it is easier to loosen the plant from its current container.
Look closely at the roots as you remove the plant. Trim away any dark or mushy roots to promote healthier growth. Healthy roots typically appear firm and light in color. If you find tightly wound roots, gently untangle them or make small cuts to help the plant spread out in its new home.
Ensure the new pot is clean and has proper drainage holes to prevent excess water from accumulating. Start filling the pot with fresh potting mix, adding a layer at the bottom to cushion the roots. After placing the plant in the new pot, fill in around the sides, pressing down the soil to eliminate air pockets. Be cautious not to bury the plant too deeply; the top of the root ball should sit just below the pot’s rim.
Assessing When to Repot Your Plants
Knowing when to repot your plants is important for their growth and overall health. Look for a few clear signs indicating that your plant may need a new home. One of the first signs is if roots start to grow out of the drainage holes at the bottom of the pot. If you see this, the plant likely wants more space.
Another indicator is stunted growth. If your plant seems to be growing slowly or has stopped growing altogether, it could be a sign that it has outgrown its current pot. Yellowing leaves can also suggest that the plant is struggling to get the nutrients it needs due to limited space.
Check the soil condition as well.
If the soil feels dry or crusty, or if it has an unpleasant smell, it may be time for a refresh. Old, compacted soil can prevent roots from absorbing water and nutrients effectively.
Pay attention to seasonal changes as well. Spring and early summer are optimal times for repotting, as many plants are in their active growth phase during these seasons.
Ensuring that your plants are in the right-sized pot is crucial to their health. Here are some signs to look for when it’s time to repot your plants:
- Roots are visible through the drainage holes, indicating crowding.
- The plant appears top-heavy or unstable in its pot.
- Soil dries out quickly after watering, suggesting the plant needs more room.
- Growth has stagnated, or leaves are yellowing, indicating root bound issues.
- Your plant requires more frequent watering than normal, which may signal it’s outgrown its pot.
Gathering the Right Tools for Repotting
Before you begin repotting your plants, gathering the right tools is essential for a smooth process. Start with a new pot that is one size larger than the current one. Ensure it has good drainage holes to prevent water from collecting at the bottom.
Next, you’ll need fresh potting mix suitable for the plant type.
This provides the nutrients necessary for healthy growth. Have some scissors or pruning shears on hand for trimming any damaged roots. A trowel can be helpful for scooping and filling soil, while gloves can protect your hands, especially if the plant has any sharp edges or spines.
A watering can or spray bottle will come in handy for moistening the soil after repotting.
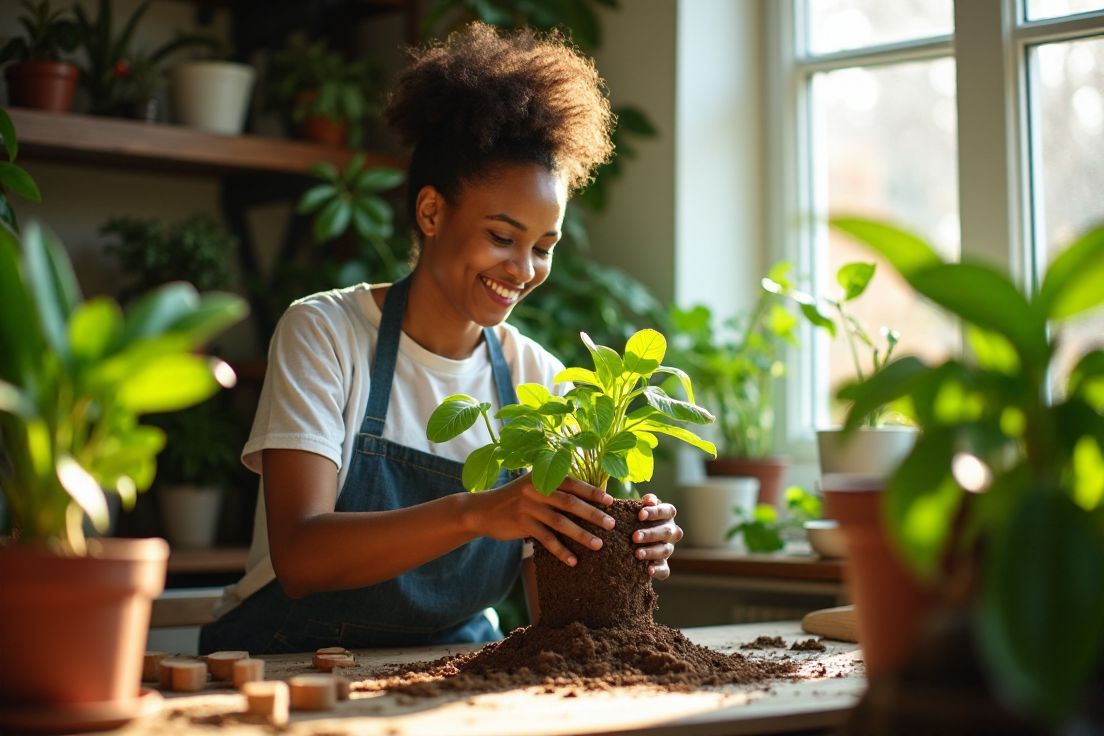
Preparing Your Plant for the Transition
Preparing your plant for its new pot involves a few important steps to ensure it adjusts well to the change. Start by checking the plants overall health before repotting. Carefully take it out of its old pot, trying to minimize any stress to the roots. The best time to do this is when the soil is slightly moist, as it allows for easier handling.
Look closely at the roots. Remove any that appear dark or mushy, as these can hinder growth. Healthy roots should feel firm and look light in color.
Ensure the new pot is ready by cleaning it and confirming that it has drainage holes.
Add a layer of fresh potting mix at the bottom to cushion the plants roots. When placing the plant in its new home, fill in with more potting mix around the edges, pressing gently to eliminate air pockets. Be mindful to keep the top of the root ball just below the pot’s rim. After you’ve finished, give the plant a thorough watering.
When repotting your plants, following proper techniques can help ensure their health and growth. Here are some important tips to keep in mind:
- Choose a pot with drainage holes to prevent overwatering.
- Ensure that the potting mix is suitable for the specific type of plant you are transplanting.
- Loosen the roots gently if they are tightly bound, promoting better establishment in the new soil.
- After watering, monitor the soil moisture to keep it consistently damp, but not soggy.
- Place the repotted plant in a location with appropriate light conditions for its species.
This helps settle the soil around the roots and provides the moisture needed for a good start.
Lastly, monitor your plant closely for the first few weeks after repotting. Keep an eye out for any signs of stress, such as drooping leaves or slower growth. If any of these occur, adjust your care routine as necessary.
This includes providing appropriate light and ensuring consistent watering, making sure not to over- or under-water.
Frequently Asked Questions
If you have questions about repotting your plants and ensuring their health and vitality, you’re in the right place. Here are some frequently asked questions to help you through the process.
When is the best time to repot my plants?
The best time to repot most plants is during the spring or early summer when they are actively growing. This allows them to take advantage of the increased light and warmth to establish roots in their new pot.
How can I tell if my plant needs to be repotted?
Look for signs such as roots growing out of the drainage holes, stunted growth, yellowing leaves, or soil that dries out quickly after watering. These can indicate that your plant needs more space or fresh soil.
What tools do I need for repotting?
You will need a new pot that is one size larger, fresh potting mix suitable for your plant type, scissors or pruning shears for trimming roots, a trowel for scooping soil, and a watering can or spray bottle.
How should I prepare the new pot for my plant?
Ensure that the new pot is clean and has adequate drainage holes. Start by adding a layer of fresh potting mix at the bottom to create a cushion for the roots, and then fill in around the sides after placing the plant.
What should I do if the roots are tightly wound?
If the roots are tightly bound or circling around the pot, gently tease them apart or make a few cuts into the root ball to encourage them to spread out in the new container.
How often should I water my plant after repotting?
Water the plant thoroughly after repotting to help settle the soil around the roots. After that, monitor the soil moisture and water as needed, keeping it consistently damp but not soggy.
What type of potting mix should I use?
Select a potting mix based on the specific needs of your plant. Succulents prefer a gritty mix for good drainage, while tropical plants benefit from a richer, moisture-retaining blend. Always avoid using garden soil for indoor plants.
Conclusion
Repotting your plants is an important step in helping them grow strong and healthy. By carefully checking your plants and their roots, you can ensure they are ready for a new home.
Make sure to use the right pot and potting mix that suits the specific needs of your plants. Taking the time to prepare both the plant and the pot will lead to better growth and less stress for your plants.